Pool lights can turn a backyard from “meh” to magazine‑worthy in one flip of a switch—but installing them? That’s where palms get sweaty. Wires, water, warranties… it feels like juggling fireworks over a swimming pool. You want that five‑star glow without frying a circuit or draining your wallet.
Here’s the straight talk: the U.S. Department of Energy notes LED lighting uses at least 75% less energy and lasts up to 25 times longer than incandescent options. That’s not hype—that’s math.
So if your pool still looks like a dark pond after sunset, stick around. We’re about to swap confusion for confidence and get your nights glowing like they should.
Tools Checklist for Pool Lights Installation
Getting Pool lights right is not just about looks; it’s about safety, durability, and smooth control. From wiring to sealing, every tool shapes how your pool light system performs. If you want swimming pool lights that last and glow evenly, this checklist keeps your pool lighting setup solid and stress-free.
Low-Voltage Transformer and 12V Tester
For safe Pool lights, voltage control is the backbone.
-
Power Conversion Setup
-
Install a low-voltage transformer near the main supply.
-
Confirm correct transformer wiring connections.
-
Check stable voltage output before linking any LED pool lights.
-
-
Output Verification
-
Use a 12V tester to confirm DC stability.
-
Double-check with a voltage meter for precise readings.
-
Keep a circuit tester handy for quick fault tracing.
-
HL recommends pairing quality transformers with reliable testing tools to avoid flicker in underwater pool lights.
IP68-Rated Cables and Corrosion-Resistant Connectors
Water and power demand respect.
-
Cable Selection
-
Choose IP68-rated cables for full submersion.
-
Use certified underwater cable rated for continuous immersion.
-
-
Connection Protection
-
Secure joints with waterproof connectors.
-
Add corrosion-resistant connectors in saltwater pools.
-
Reinforce with a splice kit and protective cable sealant.
-
Good wiring keeps Pool lights stable, even in spas or fountains.
Submersible Housing and Polycarbonate Lens Sealant
Your pool light fixture lives underwater, so build it tough. A stainless submersible housing paired with a thick polycarbonate lens handles pressure and impact. Seal edges using lens sealant, tighten the housing gasket, and inspect every waterproof seal. Don’t forget the housing O-ring—a tiny part that stops major leaks. Solid sealing keeps Pool lights bright and dry inside.
Remote Control and App Control Setup Tools
Modern Pool lights are smart, and setup matters.
-
Hardware Preparation
-
Install the wireless receiver inside the control box.
-
Connect the smart controller to the power line.
-
-
Configuration
-
Follow setup instructions carefully.
-
Complete the pairing process between remote control and app control module.
-
-
Feature Testing
-
Test color change modes.
-
Adjust brightness levels.
-
Set timers for automatic pool lighting scenes.
-
HL systems make syncing pool lights smooth, giving your swimming pool lights that clean, vibrant glow every night.
5 Steps to Prep Your Pool for Lights
Getting ready for Pool lights isn’t just about swapping fixtures. Solid prep keeps your pool light system safe, bright, and long‑lasting. From managing pool water levels to checking wiring, every move sets up smoother installation for LED pool lighting and underwater lights.
Step 1: Draining and Cleaning Around Mounting Niches
Proper prep around the mounting niche keeps Pool lights secure and sealed.
-
Lower the pool water using the drain valve until the work zone is dry.
-
Use reliable cleaning tools for detailed debris removal.
-
Focus on careful surface preparation before fitting any pool light housing.
-
Inspect the niche edge for cracks.
-
Clear sand, leaves, and buildup.
-
Wipe the cavity completely dry.
When working with HL Pool lights, clean surfaces help the gasket sit tight and prevent future leaks. Skipping this part? That’s asking for trouble.
Step 2: Checking Stainless Steel and Polycarbonate Fixtures
A solid light fixture starts with material integrity.
-
Examine stainless steel housings
-
Look for rust spots
-
Check weld seams
-
-
Review the polycarbonate lens
-
Scan for hairline cracks
-
Confirm clear visibility
-
-
Confirm overall housing integrity through detailed corrosion check and damage assessment
Good pool lighting depends on durable parts. Even premium Pool lights won’t perform if the outer shell is compromised.
Step 3: Verifying IP68-Rated Waterproof Seals
Seal failure is the silent killer of underwater lighting.
-
Inspect each waterproof seal
-
Confirm certified IP68 rating
-
Perform close gasket inspection
-
Check o-ring condition
-
-
Reinforce the moisture barrier
-
Ensure proper seating
-
Validate overall seal integrity
-
HL designs its Pool lights with tight sealing systems, but installation accuracy still matters. One twisted gasket can lead to moisture inside the LED chamber.
Step 4: Testing Low Voltage and AC Powered Circuits
Electrical prep keeps pool lights safe and steady.
-
For low voltage systems
-
Measure output with a voltage tester
-
Run a continuity test on wiring connections
-
-
For AC power setups
-
Inspect the circuit breaker
-
Confirm stable supply before powering pool light fixtures
-
Stable current protects LED pool lights and extends lifespan. No flicker. No sudden shutdown.
Step 5: Dry-Fitting RGB and Dimmable LED Units
Before locking everything in, test placement.
-
Position RGB lights carefully
-
Adjust unit placement for full coverage
-
Fine-tune light positioning along walls
-
-
Test dimmable LEDs
-
Check beam spread
-
Organize cable management behind the housing
-
Perform a complete dry fit without sealing
-
Step back and review how your Pool lights illuminate the water. Balanced brightness makes night swims feel next level. With HL systems installed right, pool lighting turns an ordinary backyard into a sharp, glowing retreat.
Do You Know Your Pool’s Electrical Requirements?
Pool lights aren’t just about glow and vibes; they run on real math and real power rules. If your pool light setup isn’t sized right, your backyard fun can turn into flicker, overload, or worse. Let’s break it down in plain talk.
Calculating 12V DC Powered vs. 120V AC Powered Loads
When planning Pool lights, start with total power consumption and smart load calculation. The goal is safe, steady shine from every pool light installed.
-
Understanding system types
-
12V direct current (DC)
-
Lower voltage
-
Increased electrical safety near water
-
Requires external transformer
-
-
120V alternating current (AC)
-
Higher voltage supply
-
Direct grid connection
-
Strict bonding and grounding rules
-
-
-
Determining fixture demand
-
Identify fixture type: LED, SMD, COB
-
Add rated wattage of each light
-
Multiply by total number of Pool lights
-
-
Comparing efficiency and safety
-
12V systems reduce shock risk
-
120V systems may reduce wiring complexity
-
For residential pool lighting, low-voltage DC is often preferred
-
HL designs pool light systems that clearly label voltage, wattage, and compatibility, making your pool lights selection less of a guessing game.
Transformer Sizing for Multiple LED Fixtures
A transformer is the heart of low-voltage Pool lights. Undersize it, and you’ll see dimming. Oversize it wildly, and efficiency drops.
-
Step 1: Calculate total LED wattage
-
Add wattage × fixture count
-
Include landscape or spa lighting if on same line
-
-
Step 2: Add safety buffer
-
Increase total by 10–20% as safety margin
-
This protects transformer capacity during peak draw
-
-
Step 3: Check technical limits
-
Confirm output matches required voltage drop range
-
Review efficiency rating of the power supply
-
-
Installation check
-
Keep cable runs short
-
Use correct wire gauge
-
Test full load before sealing connections
-
HL pool lights are engineered to sync RGB systems smoothly, but proper transformer sizing keeps every underwater light stable and bright.
Ground-Fault Protection and Corrosion-Resistant Wiring
Water and electricity don’t play nice. That’s why protection layers matter for every pool light.
-
Core protection system
-
Install a ground fault circuit interrupter
-
Provides instant GFCI protection
-
Cuts power during leakage detection
-
-
Follow local electrical code strictly
-
-
Wiring durability
-
Choose high-grade wiring material
-
Use sealed underwater cable rated for submersion
-
Prioritize tested corrosion resistance
-
-
Environmental planning
-
Account for humidity and chemicals as environmental factors
-
Protect junction boxes from splash zones
-
Inspect annually for wear
-
Good Pool lights should shine, not shock. With proper GFCI setup and corrosion-proof wiring, your pool lighting stays safe season after season. HL supports compliant installations that keep every pool light performing strong without drama.
Wiring vs. Wireless Pool Lights: Pros and Cons
Pool lights can totally change the vibe of a backyard. The right pool lighting setup boosts safety, style, and late-night swims. From wired pool lights to wireless pool lights, here’s how each pool light option stacks up.
Wired Pool Lights
When talking about wired Pool lights, stability is the big win. These pool lights connect through a fixed electrical connection to a dedicated power source, often managed by a transformer for voltage control.
-
Power & Performance
1.1 Electrical System
-
Direct electrical connection ensures constant current.
-
A step-down transformer supports low-voltage pool light safety.
-
Proper grounding reduces shock risk.
1.2 Brightness Output
-
Higher lumen levels suit in-ground pool lights.
-
Ideal for flush mount underwater lighting.
-
-
Installation & Safety
2.1 Technical Requirements
-
Increased installation complexity due to conduit routing.
-
Strict safety precautions during wiring.
2.2 Long-Term Reliability
-
Fewer signal interruptions.
-
Strong synchronization across multiple pool lights.
-
| Feature | Wired LED Pool Lights | Notes |
|---|---|---|
| Typical Voltage | 12V / 120V | Via transformer |
| Average Lumens | 800–2500 lm | High brightness |
| Expected Lifespan | 30,000–50,000 hrs | Stable power source |
HL wired pool lighting systems are built for clean installs and steady output, making them a solid pick for permanent pool light setups.
Wireless Pool Lights
Wireless Pool lights are all about flexibility. No hard electrical connection, less drilling, less stress.
-
Power Configuration
1.1 Energy Options
-
Battery operated models for above-ground pool lights.
-
Low-voltage rechargeable units.
1.2 Runtime Factors
-
Battery size impacts brightness duration.
-
Regular maintenance keeps performance steady.
-
-
Control & Convenience
2.1 Smart Features
-
Remote control or app-based pool lighting control.
-
Color-changing LED pool lights with preset modes.
2.2 Mobility
-
High portability for seasonal setups.
-
Easy repositioning around the pool wall.
-
-
Limitations
3.1 Technical Constraints
-
Reduced lumen output compared to wired pool lights.
-
Signal strength may drop with thick pool walls.
-
HL wireless pool lights balance easy installation with reliable brightness, giving pool owners a chill, low-hassle way to upgrade their swimming pool lights without heavy wiring.
How to Avoid Electrical Hazards Poolside
Pool lights add vibe and visibility, but mixing water and electricity demands real caution. From smart fixture choices to steady maintenance, safe pool lighting keeps every swim relaxed, not risky.
Use IP68-Rated Fixtures for Underwater Lighting
When selecting Pool lights, focus on certified waterproof rating and build quality designed for the pool environment.
-
Fixture Selection
-
Confirm IP68 certification for true submersion.
- Ensures stable electrical safety under continuous water pressure.
-
Choose corrosion-resistant housing.
-
Stainless steel improves corrosion resistance in saltwater pools.
-
Reinforced polycarbonate supports long-term fixture installation durability.
-
-
Verify compatibility with transformers for submersible systems.
-
-
Installation Considerations
-
Seal conduit entries tightly to protect internal wiring.
-
Position submersible lights below the waterline to prevent overheating.
-
Test insulation resistance before powering on.
-
HL designs LED pool light solutions engineered for harsh pool settings, helping swimming pool lights stay bright without compromising safety. Reliable pool lighting starts with proper materials, not shortcuts.
Install Ground-Fault Circuit Interrupters (GFCIs)
Electrical protection is non‑negotiable around water.
-
Core Protection Layer
-
Install certified GFCI protection on all nearby electrical outlets.
-
Connect lighting circuits to a dedicated circuit breaker.
-
Ensure compliance with national safety standards.
-
-
Wiring Layout
-
Separate lighting from pump lines within outdoor wiring routes.
-
Keep junction boxes elevated and sealed.
-
Label every breaker clearly for fast shutdown.
-
-
Routine Testing
-
Press the GFCI test button monthly.
-
Replace units that fail instant trip response for proper shock prevention.
-
HL systems integrate easily with modern pool lights setups, reducing risk across the entire pool lighting system.
Schedule Timer Function and Synchronization Checks
Smart control keeps Pool lights safe and efficient.
-
Automation Setup
-
Program precise timer settings for dusk-to-night cycles.
-
Limit runtime to boost energy efficiency.
-
-
System Coordination
-
Align RGB synchronization across the full pool lighting system.
-
Confirm steady voltage during color transitions.
-
-
Ongoing Care
-
Follow a quarterly maintenance schedule.
-
Inspect controllers supporting lighting automation.
-
Recalibrate timers after power outages.
-
Well-tuned pool lighting prevents overload, keeps brightness consistent, and makes night swims feel easy. Safe Pool lights are not just about glow—they’re about control.
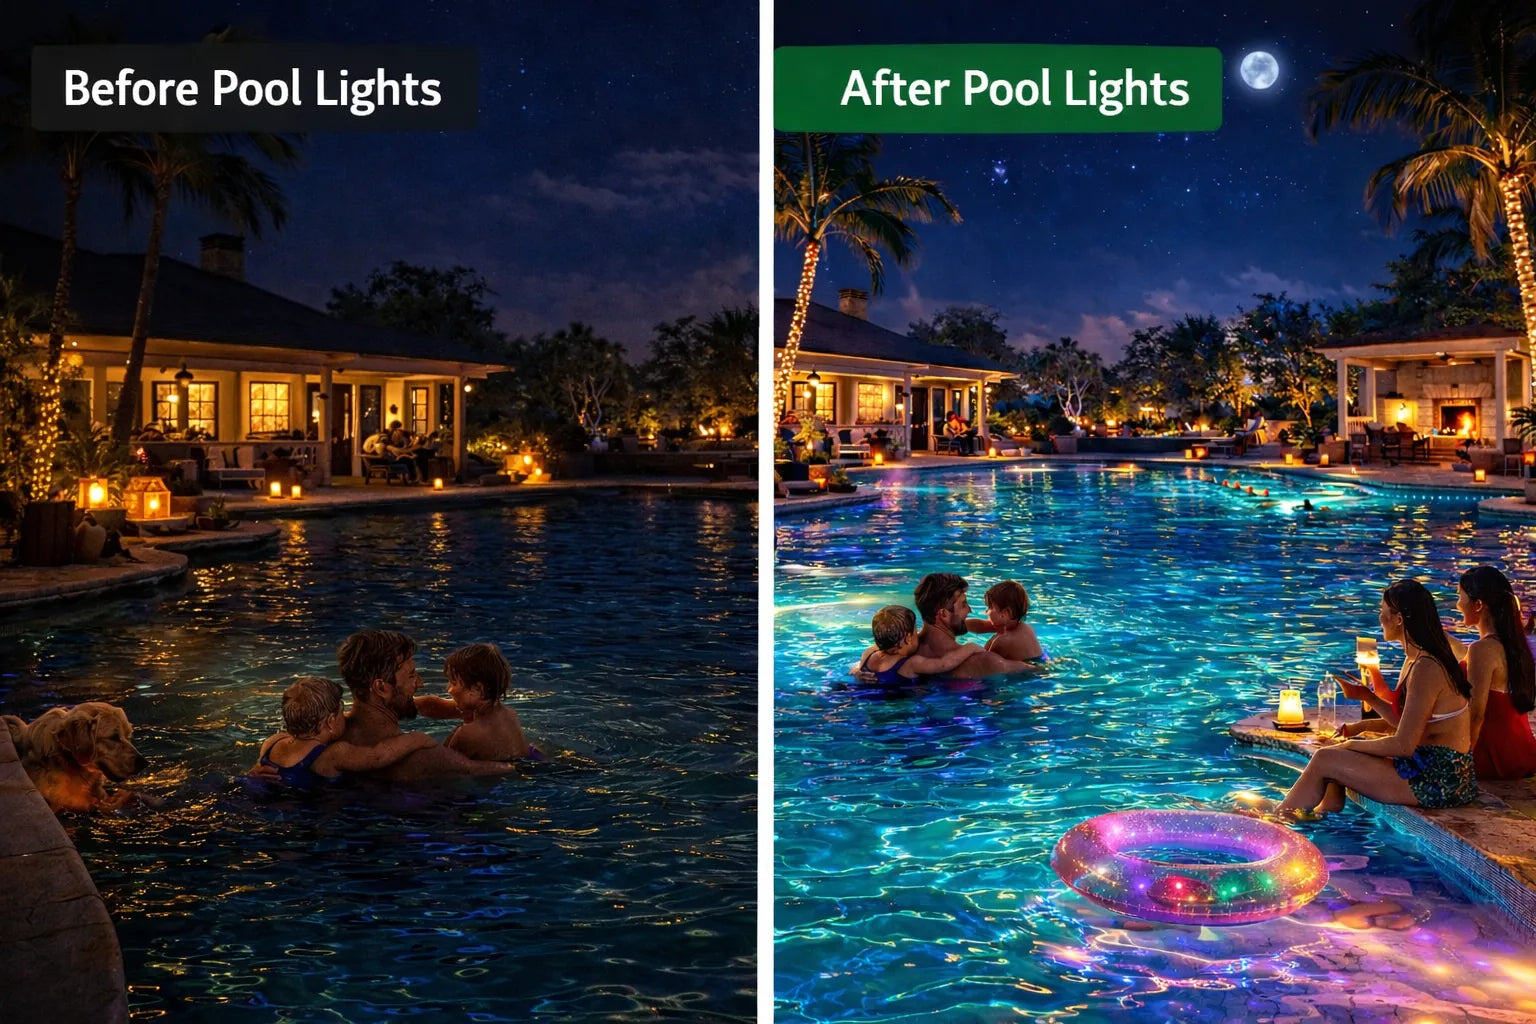
Scenario: Nighttime Safety with LED Pool Lights
Night swims are fun, but safety drops fast when visibility is poor. Smart Pool lights planning keeps every pool, spa, and deck area easy on the eyes and safe underfoot. From beam spread to mounting style, good pool lighting turns dark water into a clear, calm space.
Enhancing Illumination Area with High Lumen Output
When choosing Pool lights, brightness is more than just a number on the box. It’s about matching lumen output and beam angle to your pool size and water clarity.
-
Higher lumen output increases overall brightness
-
Wider beam angle expands coverage area
-
Balanced light intensity reduces shadow zones
For practical planning:
-
Measure pool length, width, and depth.
-
Check water transparency to assess light loss.
-
Position each LED pool light to overlap beams slightly.
Recommended Output by Pool Size
| Pool Size (m²) | Suggested Lumen Output | Beam Angle |
|---|---|---|
| 20–30 | 1,500–2,000 lm | 90° |
| 30–50 | 2,000–3,000 lm | 120° |
| 50+ | 3,000+ lm | 120°–140° |
Underwater lighting works best when beams cross gently, not blast straight down. That overlap improves visibility and keeps the whole swim zone evenly lit.
Adjusting Color Temperature for Clear Visibility
Color matters. A lot.
For safe pool lighting, focus on the color temperature shown on the Kelvin scale.
-
Warm white (2700–3000K): cozy, softer edges
-
Natural daylight (4000K): balanced clarity
-
Cool white (5000K+): sharp but sometimes harsh
Nested considerations for LED Pool lights:
-
Visual clarity
-
Neutral tones improve visibility enhancement
-
Extreme blue shifts distort water color
-
-
Safety perception
-
Balanced light makes depth changes easier to read
-
Overly saturated RGB reduces contrast
-
Stick close to 4000K for most residential pools. It keeps underwater steps, drains, and edges easy to spot without turning the water icy.
Surface Mount vs. Flush Mount for Safe Walkways
Deck safety depends heavily on mounting type.
Surface mount options sit slightly above ground:
-
Easier installation method
-
Flexible aiming
-
May create minor obstruction if poorly placed
Flush mount designs sit level with the deck:
-
Cleaner aesthetics
-
Lower trip risk
-
Require precise sealing for walkway safety
For pool and spa pathways, think in layers:
-
Perimeter lighting
- Low-glare LED pool light fixtures
-
Step lighting
- Recessed units for depth cues
-
Transition zones
- Soft side lighting to avoid harsh contrast
The right Pool lights setup doesn’t just look good. It quietly guides every step around the water.
FAQs about Pool Lights
What electrical setup is required before installing pool lights?
Safe Pool Lights start with the right power plan:
-
Power Source
-
Use a Low Voltage 12V system supported by a properly sized Transformer.
-
Choose AC Powered input with stable DC Powered output for LED or RGB fixtures.
-
-
Safety Layer
-
GFCI protection is essential near any In-ground Pool or Above-ground Pool.
-
Waterproof, corrosion resistant wiring protects against moisture damage.
-
-
Load Planning
-
Add each fixture’s Lumen Output and wattage.
-
Select a transformer rated 10–20% above total demand to prevent overload.
-
When power is stable, lights shine brighter, last longer, and feel worry-free every night.
Why are IP68 rated LED pool lights important for underwater use?
Underwater lighting faces constant pressure, chemicals, and temperature shifts. An IP68 Rated fixture is fully Waterproof and built for long-term Submersible Underwater Lighting.
Core protection elements:
-
Stainless Steel housing – corrosion resistant in chlorine or saltwater
-
Polycarbonate lens – impact resistant, clear, durable
-
Sealed structure for Nicheless, Flush Mount, or Wall Mounted installs
Inside, high-quality SMD or COB LED chips maintain steady Brightness, accurate Color Temperature, and reliable performance in pools, spas, or fountain lighting.
Without proper sealing, even strong illumination fades quickly.
Do RGB pool lights support color changing and smart control?
Yes — modern RGB LED Pool Lights are designed for atmosphere and control.
| Feature | What You Experience |
|---|---|
| Color Changing | Instantly switch moods for spa lighting or parties |
| Dimmable Brightness | Adjust glow based on pool size and Illumination Area |
| Remote Control / App Control | Manage settings without leaving your seat |
| Synchronization | Multiple Surface Mount or Nicheless lights move in harmony |
| Timer Function | Automatic on/off for energy savings |
Choose the right Beam Angle and balanced Lumen Output to light water evenly, reduce shadows, and create a calm, inviting night scene around your pool.